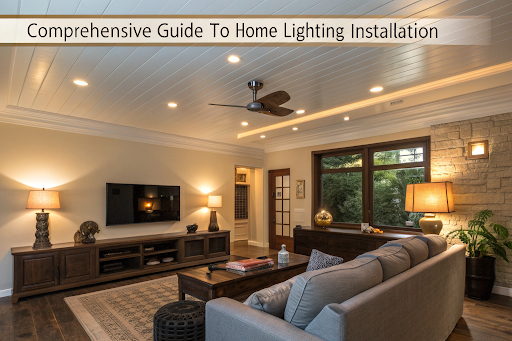
Home lighting installation is more than just screwing in a lightbulb—it’s a transformative home improvement project that enhances home décor, boosts safety, and modernizes your house with smart home features . Whether you’re upgrading a kitchen , adding ceiling fans to great rooms , or installing an outside light for your exterior space , this guide covers everything you need to know . From planning to execution, we’ll help you illuminate your rooms with style and confidence .
Why Invest in Home Lighting Installation?
Proper lighting isn’t just functional—it’s a cornerstone of home décor and daily living. Here’s why home lighting installation deserves your attention :
- Elevates Aesthetics: A well-placed lamp or pendant lighting complements furniture, blinds, and ceiling paint, tying your décor together.
- Improves Safety: Faulty wiring or overloaded electrical panels can lead to hazards. Professional home lighting installation mitigates risks.
- Enhances Energy Efficiency: Switching to LED bulbs during installation reduces electricity costs, as noted by the U.S. Department of Energy.
- Adds Smart Features: Integrate smart home controls to adjust lights remotely, a trend growing in popularity according to Forbes.
Whether you shop at Home Depot or a local garden center, the right lighting fixture can redefine your house.
Planning Your Home Lighting Installation
Before you dive into home lighting installation, planning ensures success. Here’s how to prepare:
- Evaluate Your Needs: Identify areas needing additional overhead lighting, like the sunroom, kitchen, or large rooms.
- Select Fixtures: Choose light fixtures that match your style—think ceiling-mounted fixtures for ceilings or a sleek head lamp for reading nooks.
- Check Electrical Capacity: Confirm your electrical panel supports new appliances or fixtures without overloading circuits.
- Gather Supplies: Stock up on insulated tools, electrical tape, a voltage tester, and a sturdy ladder.
Pro Tip: Use a free lighting layout tool like the one from TCP Lighting to map out your installation.
Choosing the Right Lighting Fixtures
Picking the perfect lighting fixture is key to a stunning home lighting installation. Consider these factors:
- Size and Scale: A massive ceiling fan with lights suits great rooms, while a small lamp fits small rooms.
- Bulb Type: LED light bulbs offer longevity, while incandescent bulbs provide a warm glow. Learn more at Energy Star.
- Style: Match fixtures to your décor—modern pendant lighting for the kitchen or rustic ceiling fixtures for the sunroom.
- Weather Resistance: For outdoor setups, ensure fixtures withstand rain and wind.
Tools You’ll Need for Home Lighting Installation
A successful home lighting installation requires the right gear. Stock up on:
- Voltage Tester: Ensures wires are safe to handle.
- Insulated Tools: Prevents shocks from electric wires.
- Electrical Tape: Secures wiring connections.
- Ladder: Reaches high ceilings safely.
Find these at Home Depot or online via Amazon.
Safety First: Pre-Installation Checklist
Safety is non-negotiable. Before starting:
- Turn Off Power: Switch off the electrical power at the breaker.
- Test Voltage: Use a voltage tester on house wires.
- Inspect Wires: Check wire insulation for damage.
Step-by-Step Guide to Home Lighting Installation
Ready to install your new fixture? Follow these steps for a seamless home lighting installation:
- Power Down: Shut off the breaker and confirm with a voltage tester.
- Remove Old Fixture: Unscrew the canopy, disconnect the black ceiling wire, white ceiling wire, and fixture wires.
- Mount the New Fixture: Attach the new light to the ceiling, connecting black fixture wire to black ceiling wire and securing with electrical tape.
- Install Bulbs: Add LED light bulbs for efficiency.
- Restore Power: Flip the breaker and test your lights.
Safety Note: If live wires or complex electrical components intimidate you, hire an installer.
Installing Specific Lighting Types
Different rooms call for unique home lighting installation approaches. Here’s how to tackle popular options:
- Ceiling Fans with Lights: Secure the indoor ceiling fan to the ceiling supply wires. See a tutorial at This Old House.
- Pendant Lighting: Perfect for kitchens, hang from ceiling fixtures with adjustable cords.
- Outdoor Lights: Use weatherproof fixtures for the exterior space, ensuring proper insulation.
Common Mistakes to Avoid
Even seasoned DIYers slip up. Dodge these pitfalls:
- Overloading Circuits: Too many appliances on one electrical panel risks fire.
- Ignoring Instructions: Every light fixture has unique wiring needs—read the manual.
- Skipping Safety Gear: Always use insulated tools and electrical tape.
Upgrading to Smart Home Lighting
Take home lighting installation to the next level with smart home tech:
- Smart Bulbs: Control via apps like Philips Hue (learn more at Philips Hue).
- Timers: Automate lights for energy savings.
- Voice Control: Pair with Alexa or Google Home.
Testing Your Smart Setup
Post-installation, test your smart home system:
- Dim the lights: Adjust brightness via the app.
- Set a schedule: Automate outdoor lights for convenience.
- Check compatibility: Ensure integration with ceiling fans.
Enhancing Home Décor with Lighting
Home lighting installation isn’t just technical—it’s an art. Here’s how to make it shine:
- Layer Lighting: Combine ceiling fans, lamps, and recessed lights for depth.
- Highlight Features: Use head lamps to spotlight glass panels or artwork.
- Match Aesthetics: Pair fixtures with ceiling paint or plumbing accents.
For inspiration, browse HGTV’s lighting ideas.
Energy-Saving Tips for Home Lighting Installation
Cut costs with these strategies:
- Switch to LEDs: Use less voltage than traditional bulbs.
- Add Motion Sensors: Perfect for small rooms or outdoor areas.
- Recycle Old Bulbs: Drop off at a garden center—see EPA guidelines.
When to Call a Professional
DIY isn’t always best. Hire an independent installer if:
- House wires are outdated.
- You’re installing heavy ceiling fixtures.
- The installation date is urgent.
Finding a Reliable Installer
Look for:
- Licensed electricians via Angi.
- Reviews on Home Depot services.
- Local pros with smart home expertise.
Troubleshooting Home Lighting Installation Issues
Post-installation hiccups? Try these fixes:
- Flickering Lights: Tighten fixture wires or replace bulbs.
- No Power: Recheck wiring connections and breaker.
- Uneven Brightness: Adjust voltage or upgrade electrical parts.
Final Touches for a Perfect Installation
Polish your home lighting installation:
- Adjust Placement: Ensure lights enhance natural light.
- Secure Fixtures: Double-check ceiling supply wires.
- Test All Rooms: From kitchen to sunroom, verify functionality.
Budgeting for Home Lighting Installation
Keep costs in check:
- Fixtures: $20-$200 at Home Depot.
- Bulbs: $5-$15 for LEDs.
- Professional Help: $50-$150/hour.
DIY vs. Professional Costs
- DIY: Tools + fixtures = ~$100-$300.
- Pro: $200-$500 for complex jobs.
Saving on Tools
Buy multipacks of electrical tape or rent ladders from Home Depot.
Home lighting installation blends practicality with creativity, turning your house into a haven. Whether you’re wiring a new fixture, upgrading to smart home lights, or enhancing home décor, this guide equips you with the know-how. Start small—swap a light fixture in the kitchen—or go big with ceiling fans in large rooms. With the right tools, safety steps, and a touch of style, your home will glow like never before.